» Patching Basics
This site relies heavily on Javascript. You should enable it if you want the full experience. Learn more.

Patching Basics

Korean | French | Italian

Patching pages

Introduction

Programming with vvvv is commonly referred to as patching.
The editors canvas is called the Patch.
The building blocks that make your programs are called Nodes.
Nodes have input and output parameters called Pins which are connected by Links.

The following reference goes into details about those 4 main components.

Patch

Opening a patch

To open a patch middle-click in the Patch Editor to open the Main Menu and choose:

  • Open (CTRL+O)
  • Open in Patch (CTRL+SHIFT+O)

Saving a patch

To save a patch middle-click in the Patch Editor to open the Main Menu and choose:

  • Save (CTRL+S)
  • Save As... (CTRL+SHIFT+S)

Everytime you save a patch its previous version is backed up under the same filename but ending in ~.xml. So if ever you need to go back to that previous version just rename it to .v4p and you can open it again.

Using the mouse

When patching always remember:

  • Changing the position of a node or a window is done intuitively using a left button drag
  • If you want to change any values of a pin (or in an IOBox) you will do it with a right button drag
  • You can always emulate a middle mouseclick with a SPACE + rightlick in case you don't have a middle mousebutton

Hiding vs. Closing a patch

  • If you Close a patch (CTRL+W), the patch will be removed from the system. The node containing this patch is deleted.
  • If you Hide a patch (ALT+3), the patch will still be part of the system and continue working. Only it is no longer visible.

See also: Window Modes.
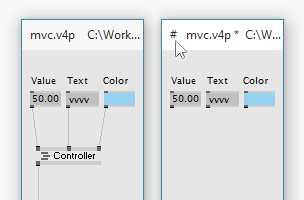
Locking a patch

To lock a patch press CTRL+E. A locked shows a '#' symbol in its topleft corner.

In a locked patch:

  • all nodes still work
  • it is still possible to change values of the visible IOBoxes
  • nodes can no longer be moved
  • hidden nodes and links are invisible

To unlock, use CTRL+E again.

Scrolling

You can scroll in a patch by right clicking on an empty space and start dragging.

Alternatively or while making a link you can:

  • use the mousewheel to scroll vertically
  • press ALT while using the wheel to scroll horizontally
  • press CTRL in addition to speed up scrolling

Comments

Double click with the left button to bring up the Node Browser. Then enter the text you want to have as a comment in the patch. Make sure the text is not matching any node before pressing ENTER to create a comment.

A comment is essentially an IOBox (String) with its input and output pins hidden. So you can always just doubleclick to change it.

Making a Module

If you want to make a patch into a reusable module, see:

Node

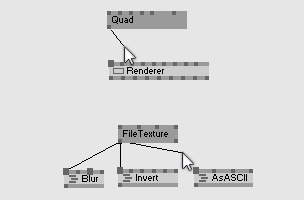
Nodes are the building blocks of your patches and each represents a specific functionality. A nodes identifier is structured in the form:

 Name (Category Version)

The combination of name, category and version is unique for each node in vvvv. Versions are optional an can be any number of space-separated strings.

While in a patch you always only see the nodes name. Hover a node to see its full identifier in the tooltip.
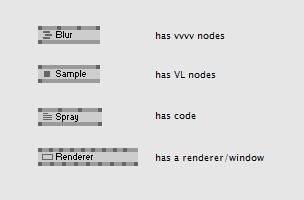
Icons

Nodes can have different icons:

  • has vvvv nodes
  • has VL nodes
  • has code (hlsl or c# code editor)
  • has a renderer/window

Every node with an icon can be rightclicked to show its editor or window. Nodes without an icon are built-in native nodes and can not be manipulated.

To get an overview of all the pins of a node, select it and press CTRL+I to open the Inspektor.

To find out more about a nodes functionality, select it and press F1 to open its helppatch.
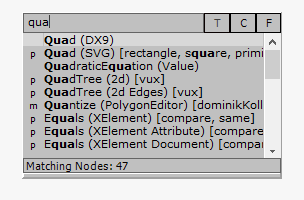
Adding nodes to a patch

You can browse a list of available nodes by double-clicking anywhere in a patch to pop up the Node Browser.

There you can start typing tags (separated by space) to search for a node with specific functionality or you can get to a category-sorted view by rightclicking in its text-area.

When you found a node you want to use in your patch press enter or select it with a left click and see it inserted in the patch.

Deleting nodes

Select a node and press the Delete or BackSpace keys to remove it from the patch.

Moving a selection of nodes

Press the cursor keys to move them by 1px.
Press SHIFT and the cursor keys to move them by 10px.

Grouping nodes

Select a group of nodes and press CTRL+G to replace them with a subpatch of the same functionality and keeping their connections to other nodes.

Note that the created subpatch still needs to be saved. Therefore it is good practice to rightclick the new node immediately and press CTRL+SHIFT+S to save it under a specific name.

Hiding nodes

Press CTRL+H to mark a selection of nodes/links as hidden.

Hidden nodes/links are not visible or accessible anymore when a patch is locked. In an unlocked patch they will stand out with a lighter shade of grey.
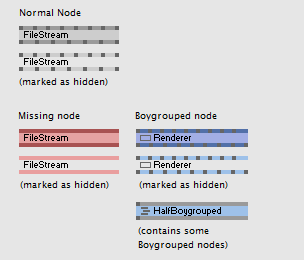
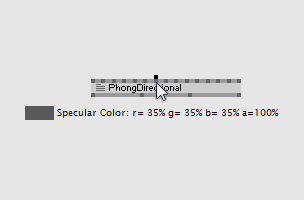
Colors of nodes

  • Red: the node has a problem, see Red Nodes
  • Pink: same as red, only the node is also marked as hidden
  • Blue: the node is boygrouped
  • Light blue: same as blue, only the node is also marked as hidden
  • Light blue & Grey border: the subpatch contains some Boygrouped nodes

More

  • Align a selction of nodes by pressing CTRL+L
  • Reset all of a nodes inputs to their defaults: ALT+Rightclick on the node

Pin

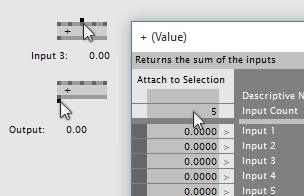
On its top and bottom a node can have any number of inputs and outputs, called pins.

  • Inputs are where you specify the parameters feeding the functionality of the node
  • Outputs are the results of the nodes function.
  • Configuration pins are only visible via the Inspektor and are used to define parameters of a node that are not supposed to change at runtime.

Data Types

Every pin in vvvv is of a specific type of data.
The most common of those types are:

Primitive

  • Value (numeric values: boolean, integer or double)
  • String (text)
  • Color
  • Enumeration (ordered listing of items)

Non-Primitive

  • Node (collective name for all other datatypes, like: Texture, Transformation, Mesh,...)

You can introduce your own custom data-types using plugins.
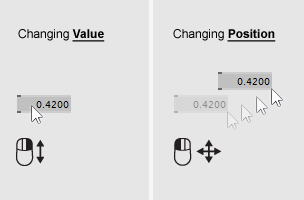
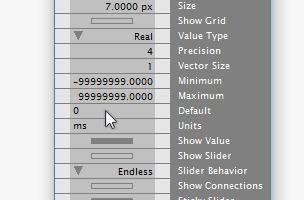
Subtypes

All primitive datatypes can have subtypes which more precisely specify a value-range a pin is looking for. Examples

  • a number subtype specifies: whole number (integer) in the range of 1 to 10
  • a text subtype specifies: a filename

Subtypes are only used for the user interface to offer more suitable means for entering the desired data to a pin but they do not influence the calculation a node is doing.

Inspecting a pin's value

Move the mouse over any pin to see a tool tip showing its name and current value.

Changing a pin's value

Values of inputs that have one of the primitive data types can be changed directly on the pin. Changing the value of a pin is like editing an IOBox:

  • Value pins: Right-drag on the pin vertically to change its value. See Value IBOxes.
  • Color pins: Right-drag on the pin to change its color. See Color IOBoxes.
  • String pins: Right click the pin to invoke the operation according to its subtype. See String IOBoxes.
  • Enumeration pins: Right click to invoke the pull-down menu with all possible values. See Enumeration IOBoxes.

Resetting a pin's value

  • Alt+Rightclick an unconnected pin to reset it to its default.
  • Alt+Rightclick a node to reset all of its unconnected pins to their defaults.

Link

Connecting pins

Two pins that have the same data type can be connected by a link.

  1. Do a left click on one of the pins you want to connect (input or output)
  2. You will see a link following the mouse cursor. All pins you can now connect to will grow to larger gray squares (Note: Hidden pins will not show up but can be connected as well).
  3. Do a left-click on the second pin. Your connection is made.
  • To cancel a link while making it, simply do a right click.
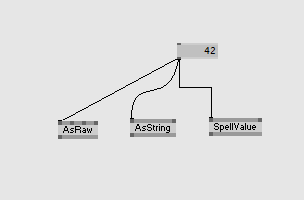
Every input pin can only take one link!
Therefore, when you try to add another link to an input that already has a link, the existing link will be replaced by the new link.

Outputs can have any number of links going from them. Except for the rare Video, Audio and Midi outputs of nodes in the DShow9 category that also can only handle one link!

To create multiple links from the same output pin, start with a right click on it and then simply left-click on all input pins you want to connect to.

While making a link you can middle click somewhere to create an IOBox that will contain the data that's in the pin you're coming from. Middle click that IOBox once again to automagically give it the name of a this pin. See also: Descriptive Name.
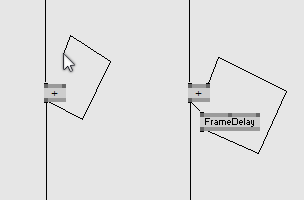
Feedback Loops

Creating a loop is not a valid connection!
If you really need to do so, you better understand what you're doing.

For details, see Creating Feedback Loops.

Segmented links

While making a link, just do occasional left clicks. For each click, an anchor point is added. If you later want to edit the shape of a link, select it and drag the little blue squares. To remove anchor points, align them in a straight line.

Link styles

There are 3 different styles for links:

  • Straight
  • Bezier
  • Vertical-Horizontal-Vertical

Press CTRL+Y on a selected link to cycle through the styles.

Removing Links

To remove an existing link, first select it (left-click) and then do a right-click on it. (or pressing the BackSpace or Delete key).

Note that when removing a link, pins with a primitive datatype behave different from Node pins:

  • Primitive data types: keep their value when they get disconnected
  • Node pins: don't keep their value when they get disconnected. Instead they return to their default

anonymous user login

Shoutbox

~4d ago

~7d ago

joreg: The Winter Season of vvvv workshops is now over but all recordings are still available for purchase: https://thenodeinstitute.org/ws23-vvvv-intermediates/

~14d ago

schlonzo: Love the new drag and drop functionality for links in latest previews!

~22d ago

joreg: Workshop on 29 02: Create Sequencers and Precise Clock Based Tools. Signup here: https://thenodeinstitute.org/courses/ws23-vvvv-08-create-sequencers-and-precise-clock-based-tools-in-vvvv-gamma/

~29d ago

joreg: Workshop on 22 02: Unlocking Shader Artistry: A Journey through ‘The Book of Shaders’ with FUSE. Signup here: https://thenodeinstitute.org/courses/ws23-vvvv-12-book-of-shaders/

~1mth ago

joreg: Talk and Workshop on February 15 & 16 in Frankfurt: https://visualprogramming.net/blog/vvvv-at-node-code-frankfurt/

~1mth ago

woei: @Joanie_AntiVJ: think so, looks doable

~1mth ago

xd_nitro: Anyone remember who increased projector brightness by removing some components that product the color?

~1mth ago

Joanie_AntiVJ: This looks super interesting (vectors over network) would anyone here know how to implement this in beta? https://github.com/madmappersoftware/Ponk